How to Build a Shuffleboard Table: Installing Your McClure Table
When it comes to how to build a shuffleboard, no one knows better than McClure Tables. Since all our shuffleboard tables are handcrafted in our very own facility, we are able to be hands-on experts in every aspect of the shuffleboard process. That, of course, includes how to install a shuffleboard table into any room.
Shuffleboard tables are shipped out in a very specific way with the boards packed inside of their respective cabinets. In order to access the room, however, you may need to remove the board from the cabinet. Gently and carefully bring the cabinet to its side, unscrew the board (it’s only screwed down for shipping purposes) and then carefully remove it. Now you can bring the cabinet in separately for a simplified installation process.
A crucial thing to keep in mind is access to the room. How will you be able to build the shuffleboard table if you can’t get into the room? They can be difficult to maneuver and may require snaking around support beams or carrying down stairs. Have a plan in mind beforehand so that you are better prepared to navigate your shuffleboard table into and around its new home.
Installing the cabinet is pretty simple and straightforward. Pull the two halves together where the dowel pins are located with a tight joint connector. Turn the cabinet legs carefully on their side and bolt the pieces together. (Some models, such as The Competitor, have hidden bolts that bolt from the inside. They are not visible in order to create a clean and sleek look for the table.) Depending on the length of your shuffleboard table, you will have either two or three legs (longer tables require that center leg) to bolt on.
As far as how to build your shuffleboard table, once you have the cabinet installed you can also level the table as you install the legs. Since shuffleboard tables should have that certain sag in the center (you don’t want a completely level surface), here’s what you can do for that while building the cabinet of your shuffleboard table. Take the leg levelers on the center legs and screw those in all the way, then take the outside leg levelers and screw those down quite a bit.
At this point, your shuffleboard should be in the exact location you intend for it to stay. With the frame set up, you’re ready to get the board itself installed. Turn the table carefully onto its rightful side. If the cabinet is in two pieces, your table will come with a brass cover for the seam where the two halves meet. You should pre-drill the bottom of the brass cover because the hard maple on the cabinets can split and otherwise crack. At this point, you should do your final leveling and adjusting before bringing in the board itself. One tip to consider is that bringing the board in through a window might be easier than trying to get it in through the door or down the stairs.
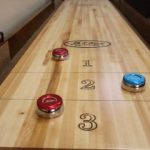
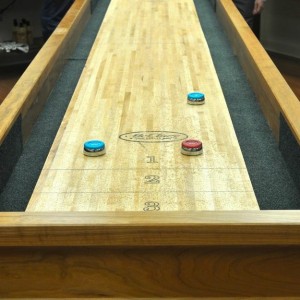
All boards have climate adjusters installed and the board properly set at the factory so you shouldn’t have very much adjusting to do right off the bat. As time, the weather, and other factors set in, however, you will want to adjust the board accordingly. Set some pucks down into the cabinet to set the board on first, so that you can measure for location and adjust if necessary. Once you’ve done that, you can remove the pucks and let the board sit down into the cradle of the cabinet. The weight of the board itself lets it sit there comfortably.
For a visual component, you can also check out this video that describes how to build a shuffleboard. We’re installing the Competitor model in this particular video, but the directions should hold water no matter what model of shuffleboard table you choose.
Learning how to build a shuffleboard is not a difficult task, provided you have a plan to get the cabinet and board into the room and some help from at least one or two other people. Since there’s no rearing way back to take shots like you see in billiards, you don’t actually need a large amount of room around the table itself once you get it installed. Make sure to let it sit for a couple days so the climactic adjusters can settle, and then get to shufflin’!